100 Pink Rambles later: tips, wins, reflections, and flops of a blogger

Wow! Who would have thought that I am already on my 100th post?  I mean, I ❤ blogging, but 100 posts, here, already? If I wanna be scholastic about my numbers, I am actually on my 264th blog post (cause I have two blogs), but it is 100 here. So, what does that mean? What have I learnt? Any tips?

Realisations & Reflections

Difference between edu-blogging and ‘lifestyle’ blogging.

Blog number 1 is an educational blog. That one is an oldie. It (now) only has to do with topics connected to teaching or ‘kinda’ teaching. My readers are teachers of English. I have a niche blog (you gotta have a niche blog).

Blog number 2, this one, is still learning. My ‘lifestyle’ blog doesn’t have a voice yet. I am still trying to figure out what I like to write about and I don’t even know if this blog is a lifestyle blog! I’d love it if there was a niche/blog category called “personality blogging”. That’s what I’d fall in. My blog is me (I seriously have a problem with calling this blog a ‘lifestyle blog!). My readers? I dunno who you are. I see numbers, but who are you?

100 posts

Tips, Wins & Flops

Choosing what to write/Inspiration

So far, I have been inspired/ got ideas from:

❤ My life (my me, me, me fest)

❤ YouTube (youtubers who talk about makeup, beauty and planning)

❤ Other blogs

Helpful tools/tips & some random blogging realisations

I have learnt a lot about blogging and taking photos and while I still have a lot to learn, these websites have proven to be my blogging saviors.

Picmonkey: I edit all my pics there. I watched a few Youtube tutorials and learnt how to add banners and pins. I am still a learner. Life saver: I also use hex codes to determine my colour choice (I am colourblind).

Samsung Photo Editor: I edit my pics on my phone first and then edit on picmonkey as well.

Stumbleupon: I have had a lot of traffic from Stumbleupon. I have also read lots of interesting blog posts there.

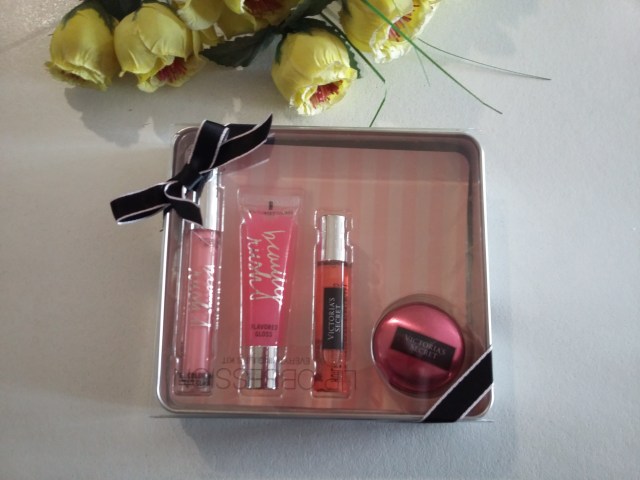
Giveaways: I organised 2 giveaways cause it was my birthday. I did get quite a bit of exposure/followings. I also got to interact with a lot of you. My lucky winners should be getting their pressies soon. Is a giveaway a way to get more readers? Yes, but only temporarily, me thinks.Was it easy to organise? Well, kinda. I used rafflecopter to pick a winner, but it was not as easy as I had wanted it to because lots of readers did not end up qualifying for the gifts. Were my rules not clear? Dunno. Have to think about that one.

Buffer: I now schedule my posts. Yayay!!

My hashtags: I do internet searches for popular hashtags when I tweet a blog post. I have also followed accounts that often retweet my posts cause they have to do with a particular interest. My faves?

For planner-related posts: #planneraddict #plannercommunity #scrapbooking #cblobloggers (also for DIY).

For my beauty/lifestyle: #fblchat #lbloggers #bbloggers #beautytalk #beautychat

Back to Realisations

Daily blogging

I tried to do daily blogging in December. It was very interesting to read other people’s #blogmas posts (blogmas means blogging every day till Christmas/ New year’s), but very challenging for me as a blogger. I wasn’t good at it. I did miss a few days. I did like the kinda daily blogging though.

Addicted to stats/ page views:

I do check my page views but I am not sure why. I started on the 10th of September 2015 with 950 page views and today 25th of January my January views are 3600. In total, I have had about 12.000 views (4,5 months). For me, that’s fine. As I said,

  • I don’t have a voice yet.
  • I dunno what I want to gain out of all this blogging.
  • I am enjoying myself so numbers are interesting, but not why I am blogging.

Stats.png

Numbers?

Numbers are just numbers. They can change. Rome was not built in a day. Slow and steady wins the race, and yes, I do know my sayings. Yes, I want people to read my posts. If I didn’t, I would have been writing in a diary, to myself, but that’s weird ( or is it….? :P). And anyhow, I am not losing sleep over them. When I start losing sleep, then I will worry (about me, not my numbers!).

Info you didn’t need, but I am gonna share anyway

Most of my readers/ visitors are from the US. 2nd place the UK, then Greece, Canada, Australia and Germany. Why is that interesting? Well, out of my top 6 countries 4 use English as their mother tongue. I am Greek, but I blog in English, so 700 Greek people have read my English blog posts, same goes for my German readers. I have also had page views from a country called “European Union”. Seriously? Where is that????? Search terms that have led to my blog? Free stickers, planners, functional stickers and yeah… a lot about stickers.

Tips, Wins and Flops part 2

Social Media

What have I been using and doing in my life?

Facebook groups: I joined lots of groups in order to interact with other bloggers. I am in the groups: show your blog love/ blogging boost/ blog passion project and a few more. For new (and old) bloggers, these groups can be extremely helpful. Join them!

Twitter chats: I have taken part in lots of twitter chats that have allowed me to connect with other bloggers and actually talk about blogging quite a bit cause my friends/family here (on my little island) just don’t get the whole blogging thing!!

Faves: #lbloggers (lifestyle blogger chat/ #fblchat (Fab chat)/#bdib (for bloggers).

Pinterest has proved to be a good way to get ideas and get blog traffic. I post a lot of posts about planning and DIY, so most of my traffic is from Pinterest. I still need to learn how to make good pins!

The good part: Wins

I have interacted with you guys (<3 my readers)and have ‘met’ lovely bloggers.

I became part of a planner team ❤ (Just Jaimee: the Lily pad) and I have had the opportunity to chat with lovely Etsy store owners from the planning community (seriously if you are not a planner, you must be baffled with all this planner/planning talk :D). I also got to share a lot of planner-related printables/ coupon codes and giveaways with my readers.

Monetizing? 1 person ordered something from Amazon (I am rich!!! I made $0,27 :))

I will be writing a collab post about planning (exciting :))

I got to do a book review where someone actually sent me the book to review. You can view that post here.

100 posts.jpg

Me, Me, Me

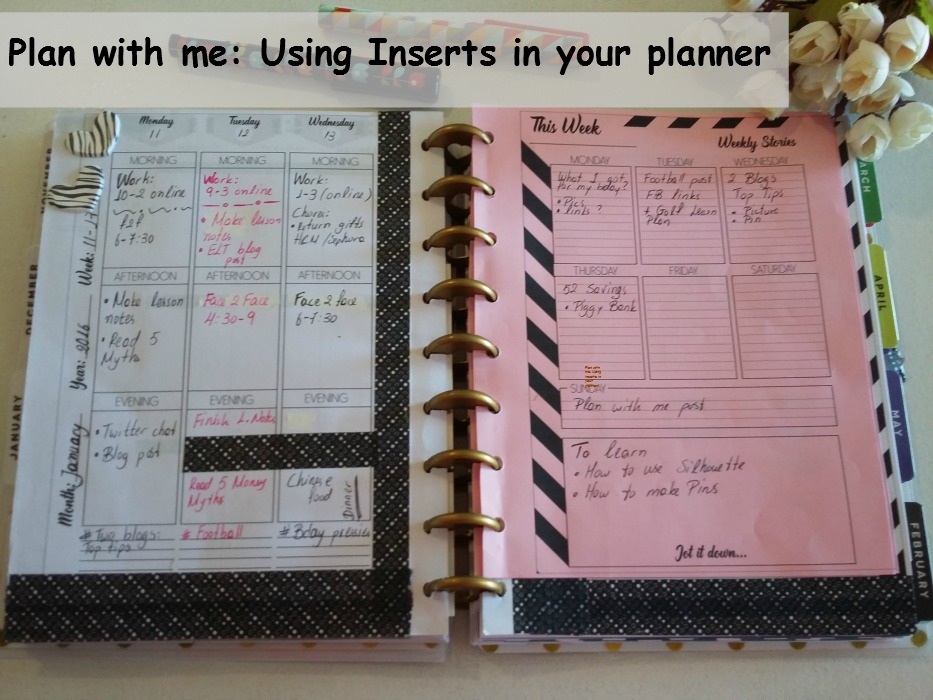
My most popular posts (toot tooting my own horn): Plan with me November 23rd. Gabis Planner prints gave me an interview and shared a printable.

The one closest to my <3: Feeling like a Unicorn: a day in the life of a colourblind gal.

Post that almost no one has read (I thought these were funny, but no-one else did :P): Greek gal in the UK: itsy bitsy spider.

You done yet?

What about the future?

Well, I don’t know what to expect. I mean, I see people hitting 10k or 200k views per day and I wonder, “How?”

I am a teacher. I ❤ teaching. When asked, “would you give up your full-time job to become a full-time blogger?” My answer is” No” ,but I still enjoy blogging. It is my creative outlet, my childhood dream of being a writer. This is as close as I can get to that aspiration.

So, that’s what I’ve learnt. You have my  wins, my flops and a lot of me, me, me talk.  I hope you found at last one thing interesting. Again, this is the part where I beg for some sort of …. connection ❤ <3.Do subscribe to my blog if you like what I have to say (it does help me out and thanks if you do). Connect with me on Pinterest / Twitter/ Instagram.Maybe even give my Facebook page some TLC? Don’t forget to ‘pin’ this post 🙂 Remember the comments section is all yours. OK!! Enough with the promo!

Thanks for stopping by

xox

Jo

P.S. I hope I don’t have too many typos. I really wanna press  ‘publish’ now, cause, yes, I am that kind of blogger……

P.S. 2 This is blog post 101. Thank God I became an English teacher cause I’d suck as a maths one!

❤ ❤


Plan with me: The Polka Dot Spread & Free Printable

I ❤ polka dots and I wanted to make a polka dot spread, so this week’s spread is just that. I got digital paper from aestheticaddiction ( I have a coupon code and a printable to share with you later on),I made a few full boxes on sticker paper, and I also printed a polka dot jpeg which I used as the background for half of my week.

My spread

full spread polka dots pin right

This week’s planning

This week I put all my work schedule on one page and my to dos/ to pay, blog post ideas and other little things on the next page. I also found a few quotes and printed them on sticker paper and added them on my spread.

Stickers used

❤ The rose on the left hand corner, the paint box, the lap top, the piggy bank, the open book and the bath tub are from Michelle and Patch.


❤ The nail polish and the coffee mug are from Planner Chick designs.

❤ The rose on the right hand side (with the stalk) and the cocktail glass are from shop Alissa love.

❤ The tabs and tear drops are from Lilly Top stickers.

❤ The scale is from the Sassy Planner.

❤ The visa card, the lip stick, and the weight is from Lemon Paper co.

Aesthetic addiction polka dot digital paper. I have some coupon codes from her store for you guys.

20DISC – this is good for 20% off a purchase.
50DISC – 50% of any order over $10.00

Paperclips

The pearl paperclip I made by myself.

The glitter flower paperclip I made myself. You can read the DIY post here.

The owl paper clip is from CandLcrafts1

 Get my polka dot printable here:

polka dot paintPolka dot printable with boxes

So, that’s all lovelies. I hope you like my spread ❤ ❤

Do subscribe to my blog if you like what I have to say (it does help me out and thanks if you do). Connect with me on Pinterest / Twitter/ Instagram.Maybe even give my Facebook page some TLC? Don’t forget to ‘pin’ this post 🙂 Remember the comments section is all yours.

Full spread polka dots with right pin


Happy planning xx

Gift ideas for your ‘girlie’ friend (what I got for my birthday)

January the 8th was my birthday, and today I am sharing with you a ‘what I got for my birthday post’ because I like reading them, and you may get inspired and have a gift idea for one of your friends! So, here’s what my friends know I like:

❤ makeup

❤ bags

❤  planner stuff

❤  clothes/ scarves

and ….. that’s what I got. My friends spoiled me loads. So, let’s unwrap, shall we?

PicMonkey Collage

Pressies

One of my friends made me this beautiful scarf. It is a one piece scarf in a nice mustard/gold colour. Isn’t it lovely? A homemade pressie   ❤

scarf.jpg

I love stationery, I like planner stuff, so my sis got me a big box, which I can use to store things, some washi tape, a cute notebook, and of course pens!

box up 2.jpg

My mum and my sis also got me some lipsticks, a blush, some nail polish and an eyeshadow brush. Now, let me just say that I have already used the eyeshadow  brush and I love it (small shading brush: applying and blending powders). It has a very small brush, but that is what I like about it. You see, I don’t see that well and I usually smudge my eye shadow (unintentionally), but this brush allows me to control the eye shadow more! I actually went and got a 2nd one (yup). The lipsticks are called Fancy Freesia (fuchsia) and Rust me (chocolate/red-ish). The blush is called golden peach and it is a gold/pink colour that shimmers just a bit (this is me giving a colour blind friendly round up of the colours).

HM.jpg

I also got a going out bag from the brand Coccinelle. I know, right?

bag.jpg

A nice and warm (fluffy) hoodie from H&M. So nice to wear. I am actually planning on joining the gym (let’s see if that happens).

hoodie.jpg

Victoria’s secret lip products: a lip gloss, lip oil (ummm dunno what that is) and a lip balm.

Victorias.jpg

Lancome Ombre Hypnose (ultra twinkling colour high fidelity) in the colour sorbet rose (golden pink) and Ombre Hypnose Stylo in the colour 05 (grey/very light charcoal).

Lancome.jpg

So, there you have it. Of course life is not about material goods but being happy. I am really grateful for all the lovely gifts I got and I am thankful. I had a lovely birthday party with my friends that night. We laughed, sang, smiled. That, in the end, is what matters. The good times.

Do subscribe to my blog if you liked this post.  Connect with me on Pinterest/ Twitter/ Instagram.Maybe even give my Facebook page some TLC?  Remember the comments section is all yours!

PicMonkey Collage.jpg

Thanks for stopping by.

xox


The 5 Money Myths: Book Review, Giveaway & Gift Card!!!

A lot went through my mind when I was informed that the book the 5 Money Myths was going on a blog tour, and that it was actually going to stop by my blog. So, I started reading a book about tested money principles and retirement plans with a fear at the back of my mind, the fear of not ‘getting’ what the book was about. BUT I actually found it very interesting, even though I am not in the US, and I am not someone who really thinks about retirement…. until now that is. So, what’s this book about?

The 5 Money Myths by Ed Kinsley and Marc Roethel.

The book talks about current retirement plans in the US and how they are failing to help people retire comfortably. It addresses 5 myths of money and then shows us the connection between money myths and saving for retirement.

What are the myths anyway?

Myth #1 You will get around to saving later.

Myth #2 We should weather the ups and downs of the market.

Myth #3 We should pay for everything with cash

Myth #4 Defer taxes any chance you get

Myth #5 Only the wealthy can achieve this.

(Kinsley and Roethel, 2015)

Each of these myths is looked at closely and analysed in a very comprehensible way.

What did I get from this book?

An urge to save money for my retirement (especially since I am in Greece).

I started thinking about my relationship with luxury. I do not need the latest technology nor the latest luxury bag. Luxury can/should be part of our lives, but it is not always a necessity.

I always pay my bills first and then by the end of the month I run out of money, so no savings.I need to ‘pay’ myself first and then worry about my bills

I shouldn’t just jump into a plan. The internet and forums shouldn’t be my sole advisor. I need to get advice on finances, insurance and retirement plans

What I liked about the book

I am a finance dummy. I don’t really care that much about savings/retirement plans, but this book did give me a clear picture of how the ‘retirement plan scene’ in the US works and it was done in a way that was like a story. What do I mean by story?

Well, the writers talk about money, retirement plans, money principles,  what you should and shouldn’t do in a way that an everyday person like me gets it! They talk about money as if it is a narrative, a story.You have the young couple trying to scrape by, the couple that lost lots of their savings and so on. Each story is connected to a myth and suggestions on how to end up with a successful retirement plan are made. Yes, there are numbers, but they are explained in a way that does not leave you baffled and running away from the book.

If you are in the US, this book gives you a clear picture of what to do in order to retire comfortably. It talks about 401(k) programme and IULS. There are lots of helpful links and suggestions on where to look for advice on your retirement plan. If you are not in the US, like me, this book is still for you because what is discussed has to do with money and we use it all around the world. We all (well, hopefully all), do retire at some point. Of course, this book is not a novel or a book you’d take on the beach and read while drinking a mojito. It is a book about money though that can be appreciated by the everyday reader. *You can purchase the book here.

The Giveaway & $100 Amazon Gift Card

Now, as I mentioned earlier, this blog is part of the 5 Money Myths blog tour and part of the tour is a 10 book giveaway and a $100 Amazon card giveaway! All you have to do is enter the giveaway by clicking on the link

a Rafflecopter giveaway

The winners will be announced on the 31st of January.

I think this book makes understanding money principles easy to understand. Gives a clear picture as to how to go about making a retirement plan and makes even someone like me, the shopaholic Greek girl start thinking about retirement plans and savings.

5 money myths

Subscribe to my blog if you like what I have to say.  Connect with me on Pinterest/ Twitter/ Instagram.Maybe even give my Facebook page some TLC?  Remember the comments section is all yours

Thanks for stopping by.

This is not a sponsored post. I was sent the book to review. I have not received any money for this review. Views expressed are my own. * I use Amazon affiliate links. You do nto pay extra for a product, I just make a small amount of money off your purchase.


DIY flower paperclips

Hi lovelies!

I have been making my own paperclips for the past few weeks and will be posting a few DIY posts, but I really got excited about my latest paperclip, so I thought I’d write a post now, and wait later 😀

Pin picture

My creation

This is a pic of my flower paperclips. You can use them in your planners/ binders, books or wherever else you use paperclips.

What do you need?

Plastic flowers with the leaves (preferably white and flowers that you can squash a bit so the flatten out and are not too puffy).

Nail polish with glitter OR glitter and clear nail polish OR glitter spray ( I didn’t have glitter spray which is why I chose nail polish. Also nail polish stains cloth which in this case is good cause it won’t budge).

Glue (ask for glue that sticks metal to cloth).

Washi tape

Scissors

Paperclips

Gloves OR nail polish remover 🙂

Patience 🙂

all together.jpg

❤ Step one

Grab your bouquet and cut your flower off it. There are plastic bits behind your flower. You need to cut them off too! Flatten the flower a bit (gently) so it is not as puffy. Take some nail polish and pour a small bit onto paper (not cloth cause it will get absorbed more quickly). Dab your flower onto the nail polish and let it dry. Depending on how glittery you want your flower to be, you dab more.

TIP 1: I chose red and white flowers.

TIP 2: If you don’t have nail polish with glitter,then use glitter and clear nail polish. I didn’t have glitter either, so I looked round my house and saw this vase full of stuff with glitter. I shaked that a bit and viola… I had glitter!

Wait for flower to dry.

❤ Step 2

Put washi tape on your paperclip so you have a flat surface to glue your flower on.

❤ Step 3

Stick your flower onto the washi. Keep it pressed for a while and then let it dry.

❤ Step 4

Back to your bouquet. Cut off the leaves and after your flower has stuck to your paper clip, stick the leaf on the other side. Press it for a while. By adding the leaf  you cover the washi on both sides.

Let your paper clips dry.

What else can I use?

Well, I got  little stickers that have fake drops (like diamonds) and pink diamond stickers from a crafts supply store . I stuck those onto my flowers to mimic a kind of raindrop effect.

Durability?

Durability depends on how gentle/rough you are with your paperclip. I have not had any problems.

If you don’t have any of these things at home, you can get some from Amazon. I did a little search and found some fairly inexpensive items (these are affiliate links which means I get a small commission from your purchase, but the price for you is the same).

780pcs Bling 6mm Multicolor Sheet Diamond Crystal Rhinestone Gem Self Adhesive Stickers

Get this here. Current price for 780 pieces:$5.99.

diamond stickers

KINGSO 1 Bouquet 21 Heads Small Artificial Peony Ranunculus Flowers Garden Craft Home Wedding Decor

You can get this here. Current price $3.99.

Amazon bouquet.png

Screen shot from Amazon. com

 🙂 Subscribe to my blog if you like what I have to say.  onnect with me on Pinterest/ Twitter/ Instagram.Maybe even give my Facebook page some TLC?  Remember the comments section is all yours.

Pin picture

Happy DIY-ing 😀

Thanks for stopping by


Plan with me:the ‘rich’ spread & Free printable

Hi lovelies!!

Today’s spread is with digital paper from AestheticAddiction and the printable is something I put together myself. Disclaimer: I am colourblind and while I do think this spread looks ‘busy’ , I prefer to label it as ‘rich’. Colours don’t distract me, so I find it pretty.

glowy spread PIN

My spread

In the top boxes I write down my work schedule. In the bottom boxes my To Dos and things that need to be dealt with some time this week. My sidebar has been dedicated to money and kilos! I want to track how much cycling I do and my weight. I think that if I have that in my planner I will feel guilty and end up doing some exercise.

Printing tips: I made this using Word. If you want a post about how I made this, please let me know in the comments below.


Extras

You can download the printable here.

Doc2

Dimensions: width 1.5 inches and height 2.5. I use the Happy planner with the gold heart in the middle (dunno its name :D).

Make sure that when you press print you have chosen the printer option: “actual size” otherwise the boxes shrink. Trial and error folks.

I interview Aestheticaddiction a while back and she gave me two jpegs and coupon codes which are still valid. You can find the coupon codes and the jpegs here (I made new covers for my planner with the jpegs)

Other stuff. The washi tape is from the 1 euro store. The pearl paperclip I made myself. The pens are from local bookstores but Amazon sells similar ones.Rbenxia Gel Ink Roller Ball Pens Plastic Cartoon Pin Type Office Students Pen Pack of 10pcs * You can get them here.


pens

If you are looking to buy an Eric Condren planner, I have a $10 off offer for you guys if you purchase the planner by pressing the words $10 off my ELCP below (this is a referral link).

$10 off my ECLP$10 off my ECLP

*If you want a Happy Planner and are not in the US (that’s what I am using and I love it), you can buy the same one as mine by pressing here.

spread rich


This is the part where I beg for followers 🙂. Subscribe to my blog if you like what I have to say.  Check out this post.about being colour-blind. Connect with me on Pinterest/ Twitter/ Instagram.Maybe even give my Facebook page some TLC?  Remember the comments section is all yours. Check out my planning category on the side bar for more planner-related posts and freebies. If you love stationery and organisation, check out this post.

Thanks for reading! Happy planning everyone 🙂 ❤ ❤


Had a nite out? My makeup removing routine

I am forty. Yup, and I have neva, eva slept with makeup on my face. No matter how late it is or tired I am. I always remove my makeup. This post is not about how to clean your face though. Nope. I am going to talk about the steps I take to take makeup off after a night out. Some heavy-duty involved ladies, cause no makeup must be left on the face. So,

All products.jpg

❤ Step 1

Makeup remover wipes

I use a few wipes to take off the first layer of makeup. I use a couple. Not just one. My favourite facial wipes are Nivea facial wipes. Nivea is one of my favourite brands.*You can get them here.

❤ Step 2

depending on how heavy my makeup is, I use the Sephora Supreme Cleansing Oil (nothing stays on) and most of the times… nothing does stay on.If there is a lot of makeup, I rub it gently on my face, and then rinse it off. But because this product leaves a bit of oily residue, which I do not like, I then also use The Body Shop Tea Tree facial wash or the Caudalie Instant Foaming Cleanser (<3 This is my favourite soft facial wash. I love the smell. It is gentle. I just love it!! I use it in the mornings to wash my face as well. Unfortunately, I just ran out and need to get some more!!* You can get it here). I have written a review for the Tea Tree Facial wash. You can read that here.

If after the wipes, there is not that much wakeup on, I use my Bioderma make-up removing micelle solution for sensitive skin. So, basically,  I alternate between Sephora and Bioderma.

skin cleansers.jpg

Semi-step

Sometimes I have to use eye makeup remover as well and I am using the eye makeup remover from Erre Due (Italian brand).

❤ Step 3

Toner time! I use the Body Shop Invigorating Toner with pomegranate (signs of ageing).

❤ Step 4

My moisturiser.

cartoon.jpg

So, lovelies. You really gotta take off your makeup and let your skin breathe!!

Do follow my blog if you want to read more from me. Connect with me on Pinterest/ Twitter/ Instagram. Maybe even give my Facebook page some TLC?  The comments section is all yours. Tell me what you use to take your makeup off. I am really interested in trying things out.

Thanks for stopping by.

xx

Joanna


Product Review: Charles Worthington Shine Booster

Today I am going to talk about one of my hair styling staples. This is a product I love and always stock up on. So, this review is more like an ode to a product than a review. What am I talking about?The Charles Worthington London Shine Booster: all over gloss spray.

According to the bottle, it gives your hair

    ❤  a shine boost

❤ a mirror shine finish

❤  a smoothing effect

hair spray cartoon

Does it do what it says?

Yes!!!! Keep in mind though that I am blond with highlights. You can see my hair in the picture below. Nice and shiny, no?

Me glasses

How do I use this?
I spray it on my dry hair whenever I want my hair to be nice and glowy.  A generous spray/spritz. Nothing stingy ladies!! A good spritz goes a long way. I am blond and my hair becomes really shiny, to the point I get compliments (yup <3).

What does it smell like?

Freshness. No particular odor. It’s like coming out of a hair salon. The smell of clean hair.

Would I repurchase?

Um…. Yeah. Not just repurchase, but stock up!! I actually buy loads of bottles every summer  when I am in the UK (but I live on an island…. in Greece).

Hair Spray

If you are in the UK, you can get it at Boots or Superdrug. You can also find it at retailers who carry Charles Worthington London products.

I have talked/raved about this product before in my 5 a nite out post. You can check out what are my ‘going out essentials’ here.

hair spray colour pin.jpg

Now, this is the part where I beg for subscribers and followers etc. etc. But anyhow, here goes. Do follow my blog if you want to read more from me. Connect with me on Pinterest/ Twitter/ Instagram. Maybe even give my Facebook page some TLC?  The comments section is all yours.

Thanks for stopping by.

xx

Joanna


You have two blogs? Tips to make it (kinda) work

I have been an educational blogger since 2013. In September I started a 2nd blog because I cannot keep on bombarding my (edu)readers with girlie/lifestyle posts. That’s how this blog was born. But as 3 months have gone by, I can tell you that it is not as easy as it seems. Today, I am going to share with you some of the things that have worked for me and some that I am still trying to figure out.

Things you need to ask yourself

  • Why am I blogging?

This is probably the most important question. What do you want to achieve through blogging? For me, at the moment, blogging is a source of fun and pleasure. I enjoy it. I like sharing my thoughts, interacting with you guys, and learning (because you do need to do a bit of research for some posts). I also think that blogging is an outlet for my writer/author aspirations. When I was a kid, I wanted to become a writer. I actually wrote little books (yeap).

  • Niche vs. no niche?

Next thing you need to think about is whether your blogs are going to be focused on something or more general blogs. I have one blog that focuses on teaching English as a second language. That’s my niche. I mostly actually write about English for Specific Purposes which is teaching Business and Academic English. So, I have somewhat of a niche within a niche.

Regarding this blog though, I am still trying to find my voice. I do know that a lot of my posts have to do with planning, beauty, being colourblind, and shopping/reviews. I guess this all goes under the lifestyle umbrella (?).

Finding a voice and deciding on what you will be focusing on takes time. You also see what your readers like and if you like the same things, this may help you.

  • Do I have the time?

This goes back to the first bullet point. Why are you blogging and do you have enough time to blog? Intertwined these two folks.

Since one blog is not enough, are there any benefits of having two? Can one help the other?

For me, yes. I have been edublogging, but cause I am a wacky edublogger, I did write various loose-r edu blog posts. Posts about planning, books, being colourblind, even how I spent my summer in the UK. So, I was able to reblog/adapt the posts here.

You can get readers from one blog, read your other blog. I do have lovely teachers who read my edu blog,they pop over here as well, and follow this blog too (thanks dears xxx), but I do not bombard my teacher friends with the blog posts on this blog. “So, what should I do?” you may ask. To share (with your existing readers) or to not share?That’s the question! I guess this is up to you. I do not like being pushy.

How I am going about….’doubleblogging’

Social media: Because I didn’t want to bombard the people who were reading my educational posts with my ‘lifestyle’ ones, I decided to make different social media accounts. So, this blog has its own Twitter/Facebook page/email account. My Instagram is mostly for here and my Pinterest board is for anything.

Making it work: I plan. A lot.  I write down my ideas for both blogs and then try to squeeze in posts. Getting ideas is easy. Finding the time to write is difficult. This is probably the biggest challenge. It is very hard to keep two blogs going because I am a full-time teacher.

Sharing and promoting is also very time-consuming. I do schedule posts and I am using Buffer, but it is still hard to promote what I write. So this is something you need to think about as well (referring you back to bullet point numero uno).

So, that’s all folks. These are my thoughts on having two blogs. A few suggestions on how to make it work. I am still learning though. I will be back with a follow-up post. No worries.

Now, this is the part where I beg for subscribers and followers etc. etc. But anyhow, here goes. Do follow my blog if you want to read more from me. Connect with me on Pinterest/ Twitter/ Instagram.Maybe even give my Facebook page some TLC?  The comments section is all yours. Check out my writing/blogging page for more posts about blogging/writing.

Blog post pin

Thanks for reading.

Joanna

Plan with me: Using inserts in your weekly spread

Hi lovelies,

Today I decided to be a bit more meticulous with my planning and use add ons/ inserts in my weekly planning ‘ritual’. So, I will show you what I used and how I planned.


How I planned

I used my Happy Planner and the Storyteller 2016 : Story Planner System A5 Calendar / Vertical / Inserts I got from The Lilypad.

There are 4 sheets. I used the weekly planner spread to write down what I have to do in the mornings/afternoons/evenings. I wrote my work schedule and general tasks. I used sticker paper for these two sheets.

1sthalf


I also printed on a different coloured sheet  the weekly stories page on which I wrote down my blogging plans for this week. The other sheet had functional boxes that included What I am eating and Pay now/ On time/ Important boxes. I used the what I am eating not to document my eating plan for the week,but to write down what I actually eat because I am starting a diet and I want to document my junk food consumption  :D. The  other boxes were used according to their headings. Pay now for bills. On time for deadlines and important for things I mustn’t forget to do.

coloured paper


What I like about this spread

I have more space to write. I have space to do more detailed planning (my blog posts) and it looks nice with the different coloured sheets.

Stickers I  used

Washi tape and love hearts from the one euro store (here in Greece).

Pinterest pic.jpg


If you want to check out The Lilypad, press this link. She has lots of planner inserts and other planner/scrapbooking -related products.

This is the part where I beg for followers 🙂. Subscribe to my blog if you like what I have to say.Check out my latest post on how to store your pens/pencis using mugs and jewelery boxes.

Connect with me on Pinterest/ Twitter/ Instagram.Maybe even give my Facebook page some TLC?  Remember the comments section is all yours. Check out the planning category (side bar)for more planner-related posts.

Thanks for reading!