How I plan my blog posts: decorative planning

#Feb ❤

So as I said in my previous post, I will be writing blog posts about things I ❤ and I will be using the hash tag #Feb ❤ while doing this. I will be writing posts till February 14th and you are welcome to do the same (just use the hash tag #feb ❤ if you decide to do so). Today I will be talking about two things I love: decorative planning and blogging. So, let’s ‘girly’ plan.

Feb hearts post 2

What’s decorative planning?

Using any decorative element in your planner. It can be from using different colour pens to stickers and washi tap.

Why do I like decorative planning?

❤ it is creative

❤ it looks pretty

❤ it’s a leisure activity for me

❤ it makes planning less stressful because my plans look prettier & the whole process is something I enjoy.


Does it take time?

About an hour or two every week.

background

Decorative planning and my blog posts

At the end of every month I kinda plan my blog posts and I look at my previous month.

What do I do exactly?

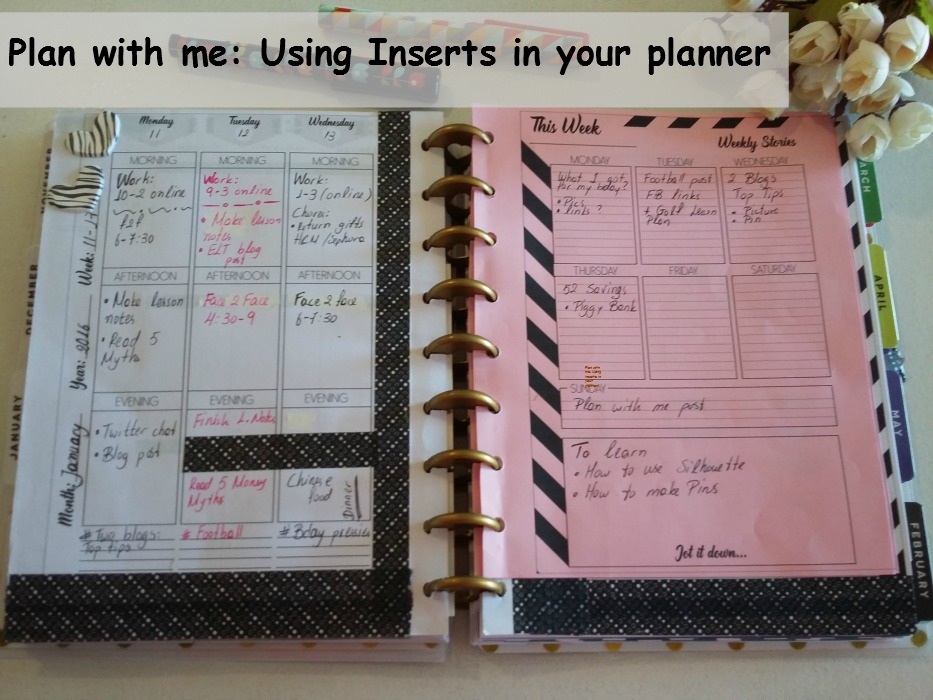
I have inserts from the storyteller 2016 and I write down several things. What exactly?

Well, I have two lined pages where I write down my stats. I look at my page views, most popular posts, words that get ‘searched’ and send people to my blog, and items that get clicked in the actual blog posts. I write down if I have monetised and wins of the month like if anyone has emailed me to collab or send me products to review/use.

Traffic

I write down what traffic comes from where. That way I know which type of social media brings me the most views. I, for example, write lots of DIY and planner-related posts. Pinterest and Facebook groups (related to planning) bring me a lot of traffic.

I also write down social media sharing formats that are lacking. Twitter, for example, brings me the least traffic. This helps me focus on trying to get more views from twitter. I started, for example, taking part in more twitter chats and that has been very helpful.

I also write down a few goals for the next month. I do not make a fuss about this though because I do not want to stress myself with numbers and goals. I am more of a slow and steady type of blogger (that’s probably why I have 3 readers :P. I do ❤ you though xx).

I then use my weekly inserts and write down blog post ideas. I write down a few ideas or key words. This helps me brainstorm. Of course I do not always stick to the days or the order I have written down my blogging ideas, but it does help me get ideas, and it forces me to sit down and think. The fact that I am using inserts also allows me to move things around, take pages with me etc. The fact that I have previously looked at my stats and popular posts also gives me a sense of direction.

My blog post planning is all on paper and it is the initial blog planning stage. I do not take pictures or write actual blog posts. Nope. I just sit down with a cup of coffee some music in the background and chill whilst planning. Cutting stickers, using washi tape relaxes me.
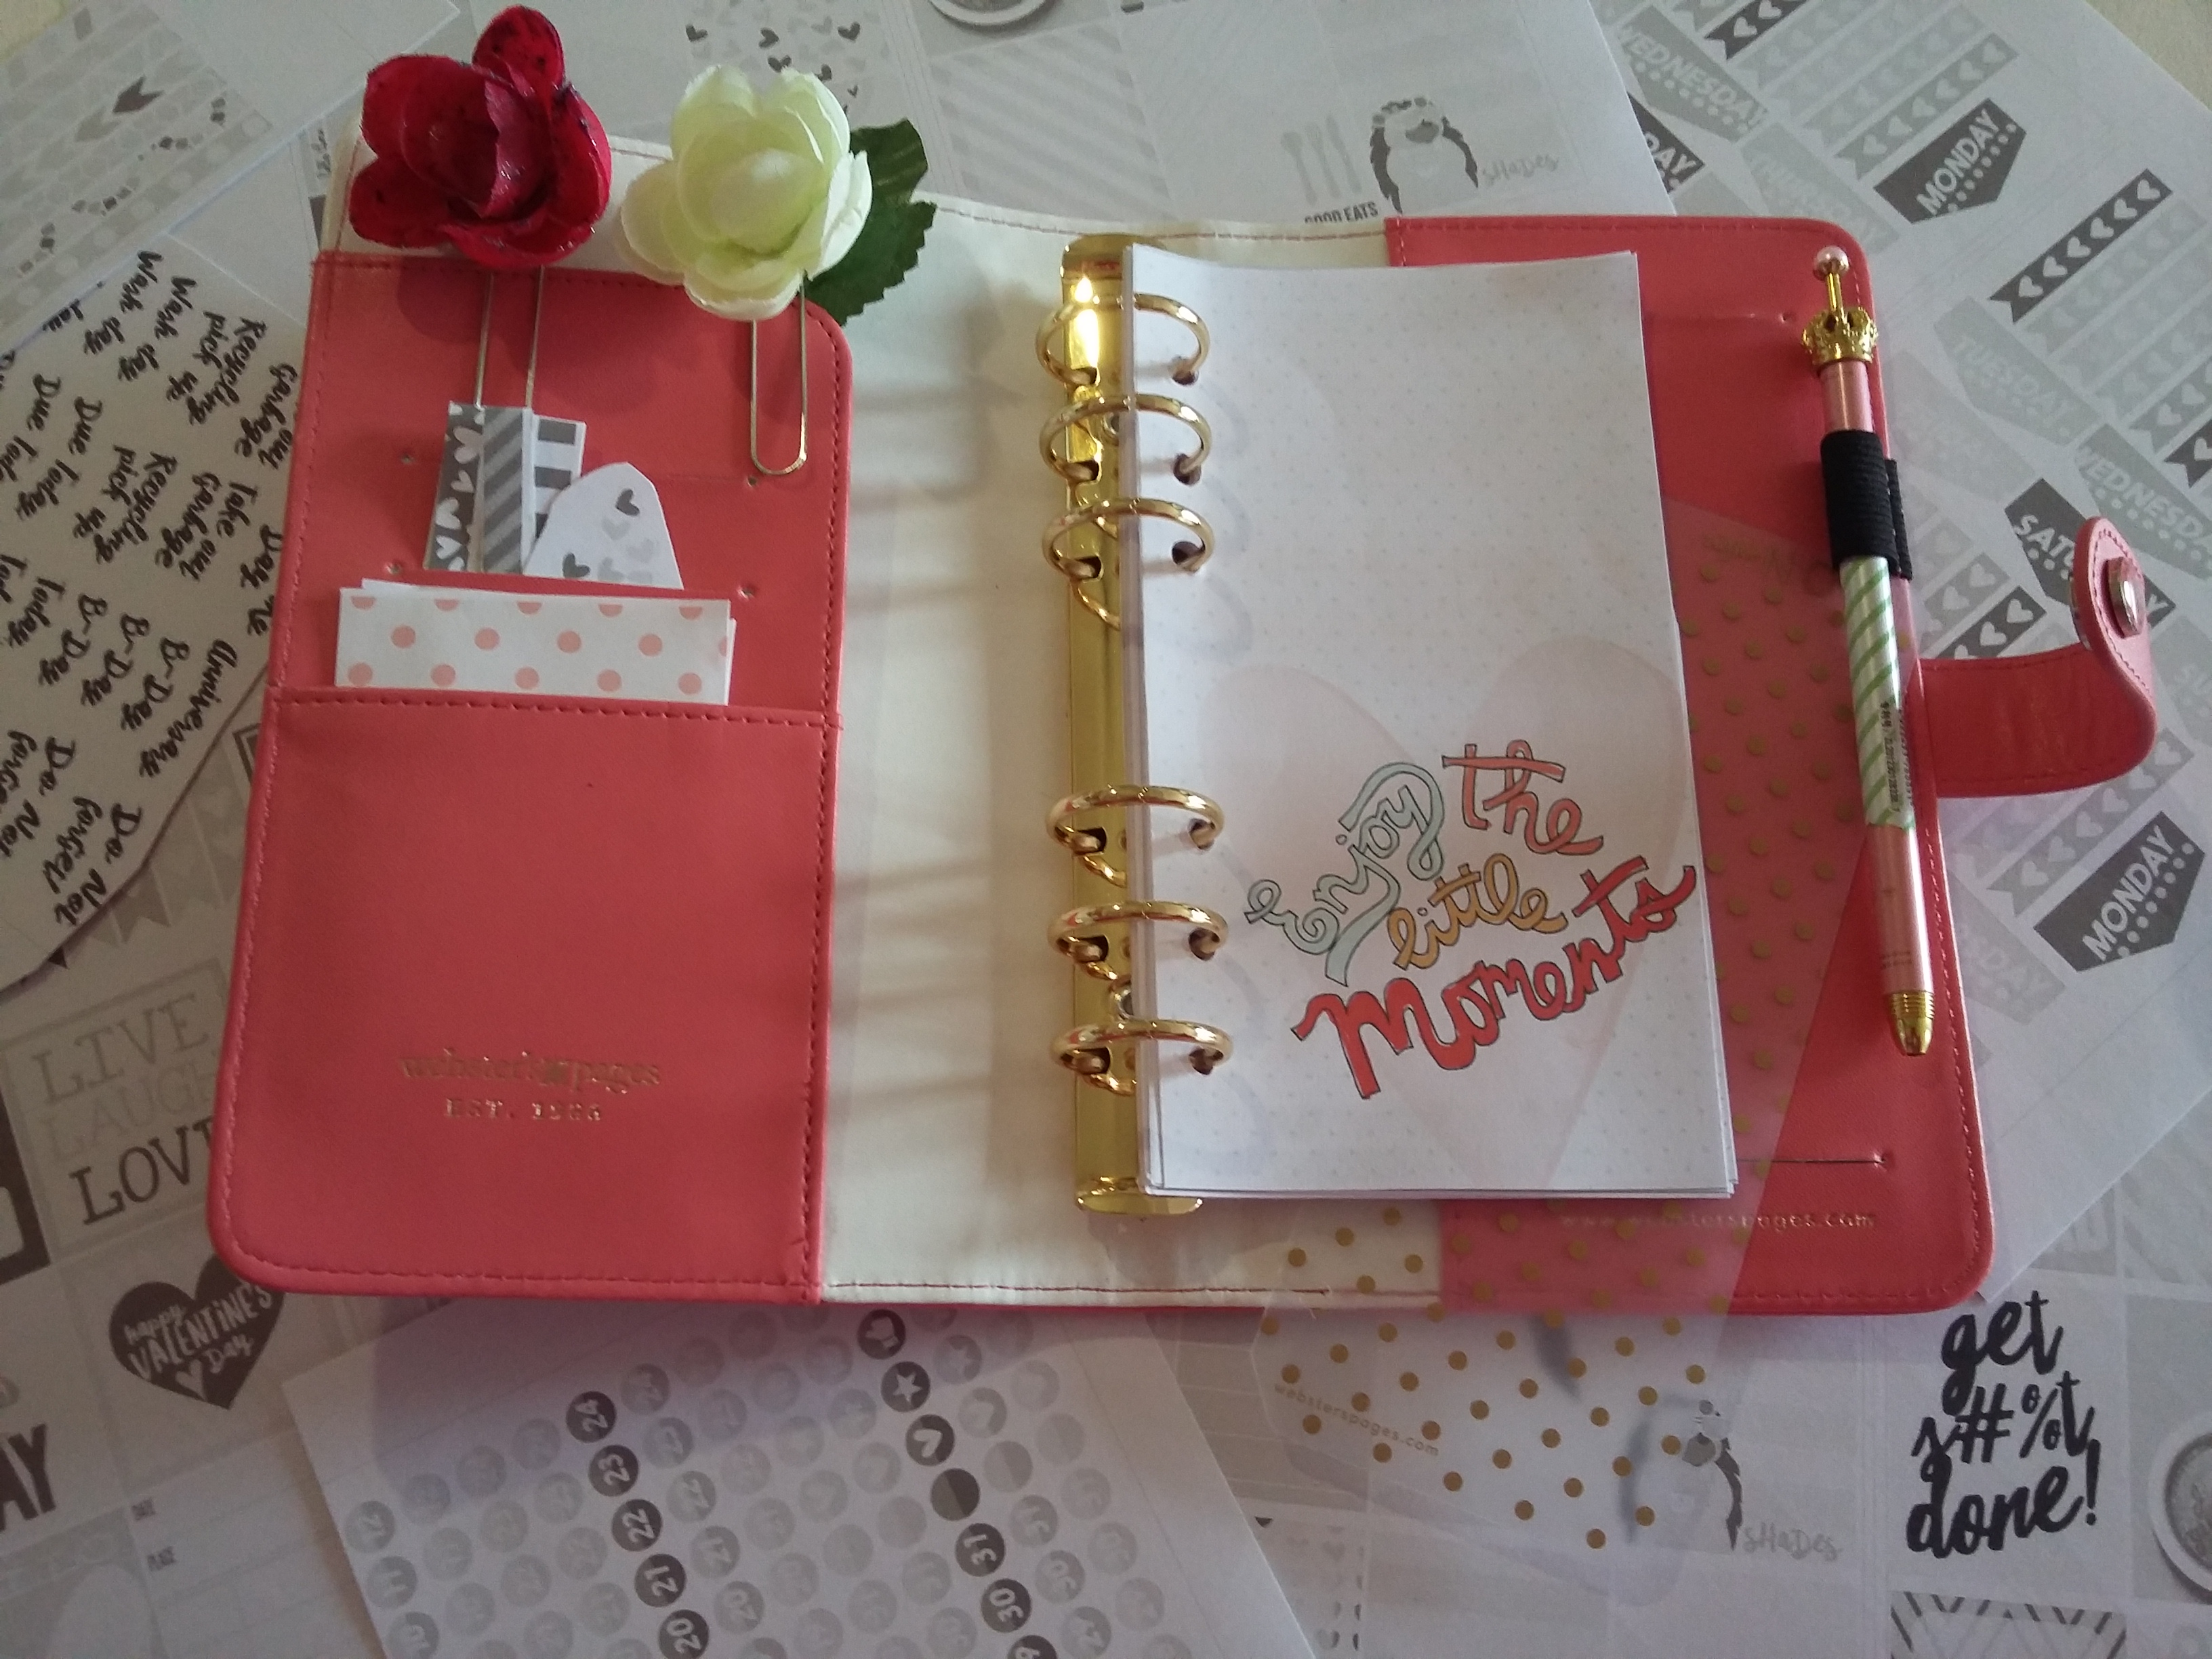
What am I using?

My pretty planner is a *light pink colour crush planner which I got from Amazon. They have sold out but you can get an A5 size colour crush here. (It is a bit bigger).

CC pic

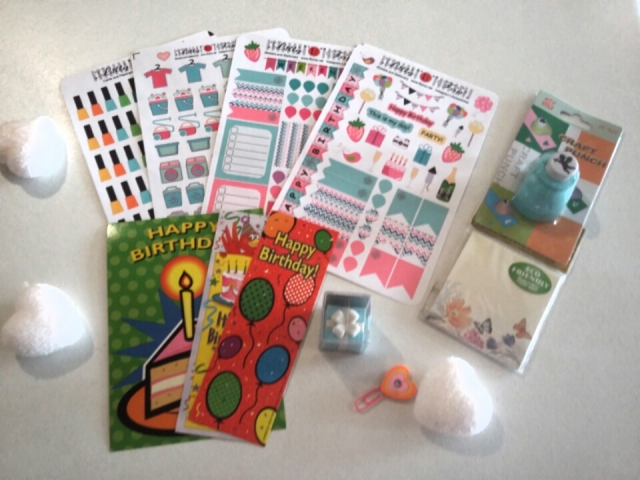
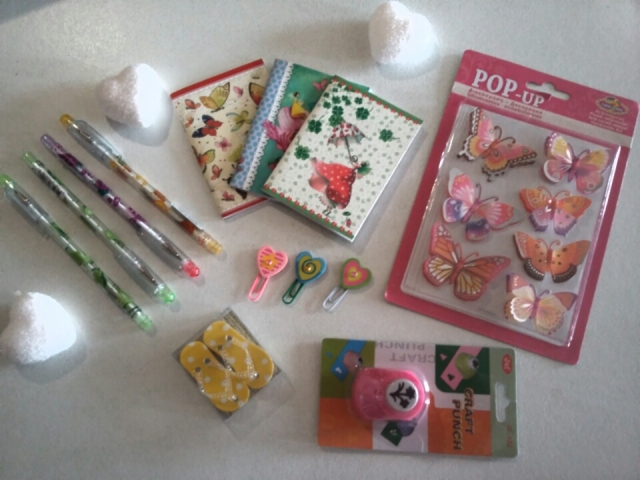
All my inserts and the stickers you see in all the pictures are from the Story Planner 2016 February Kit – Storyteller Add-on.You can get my inserts and stickers here.

sticker

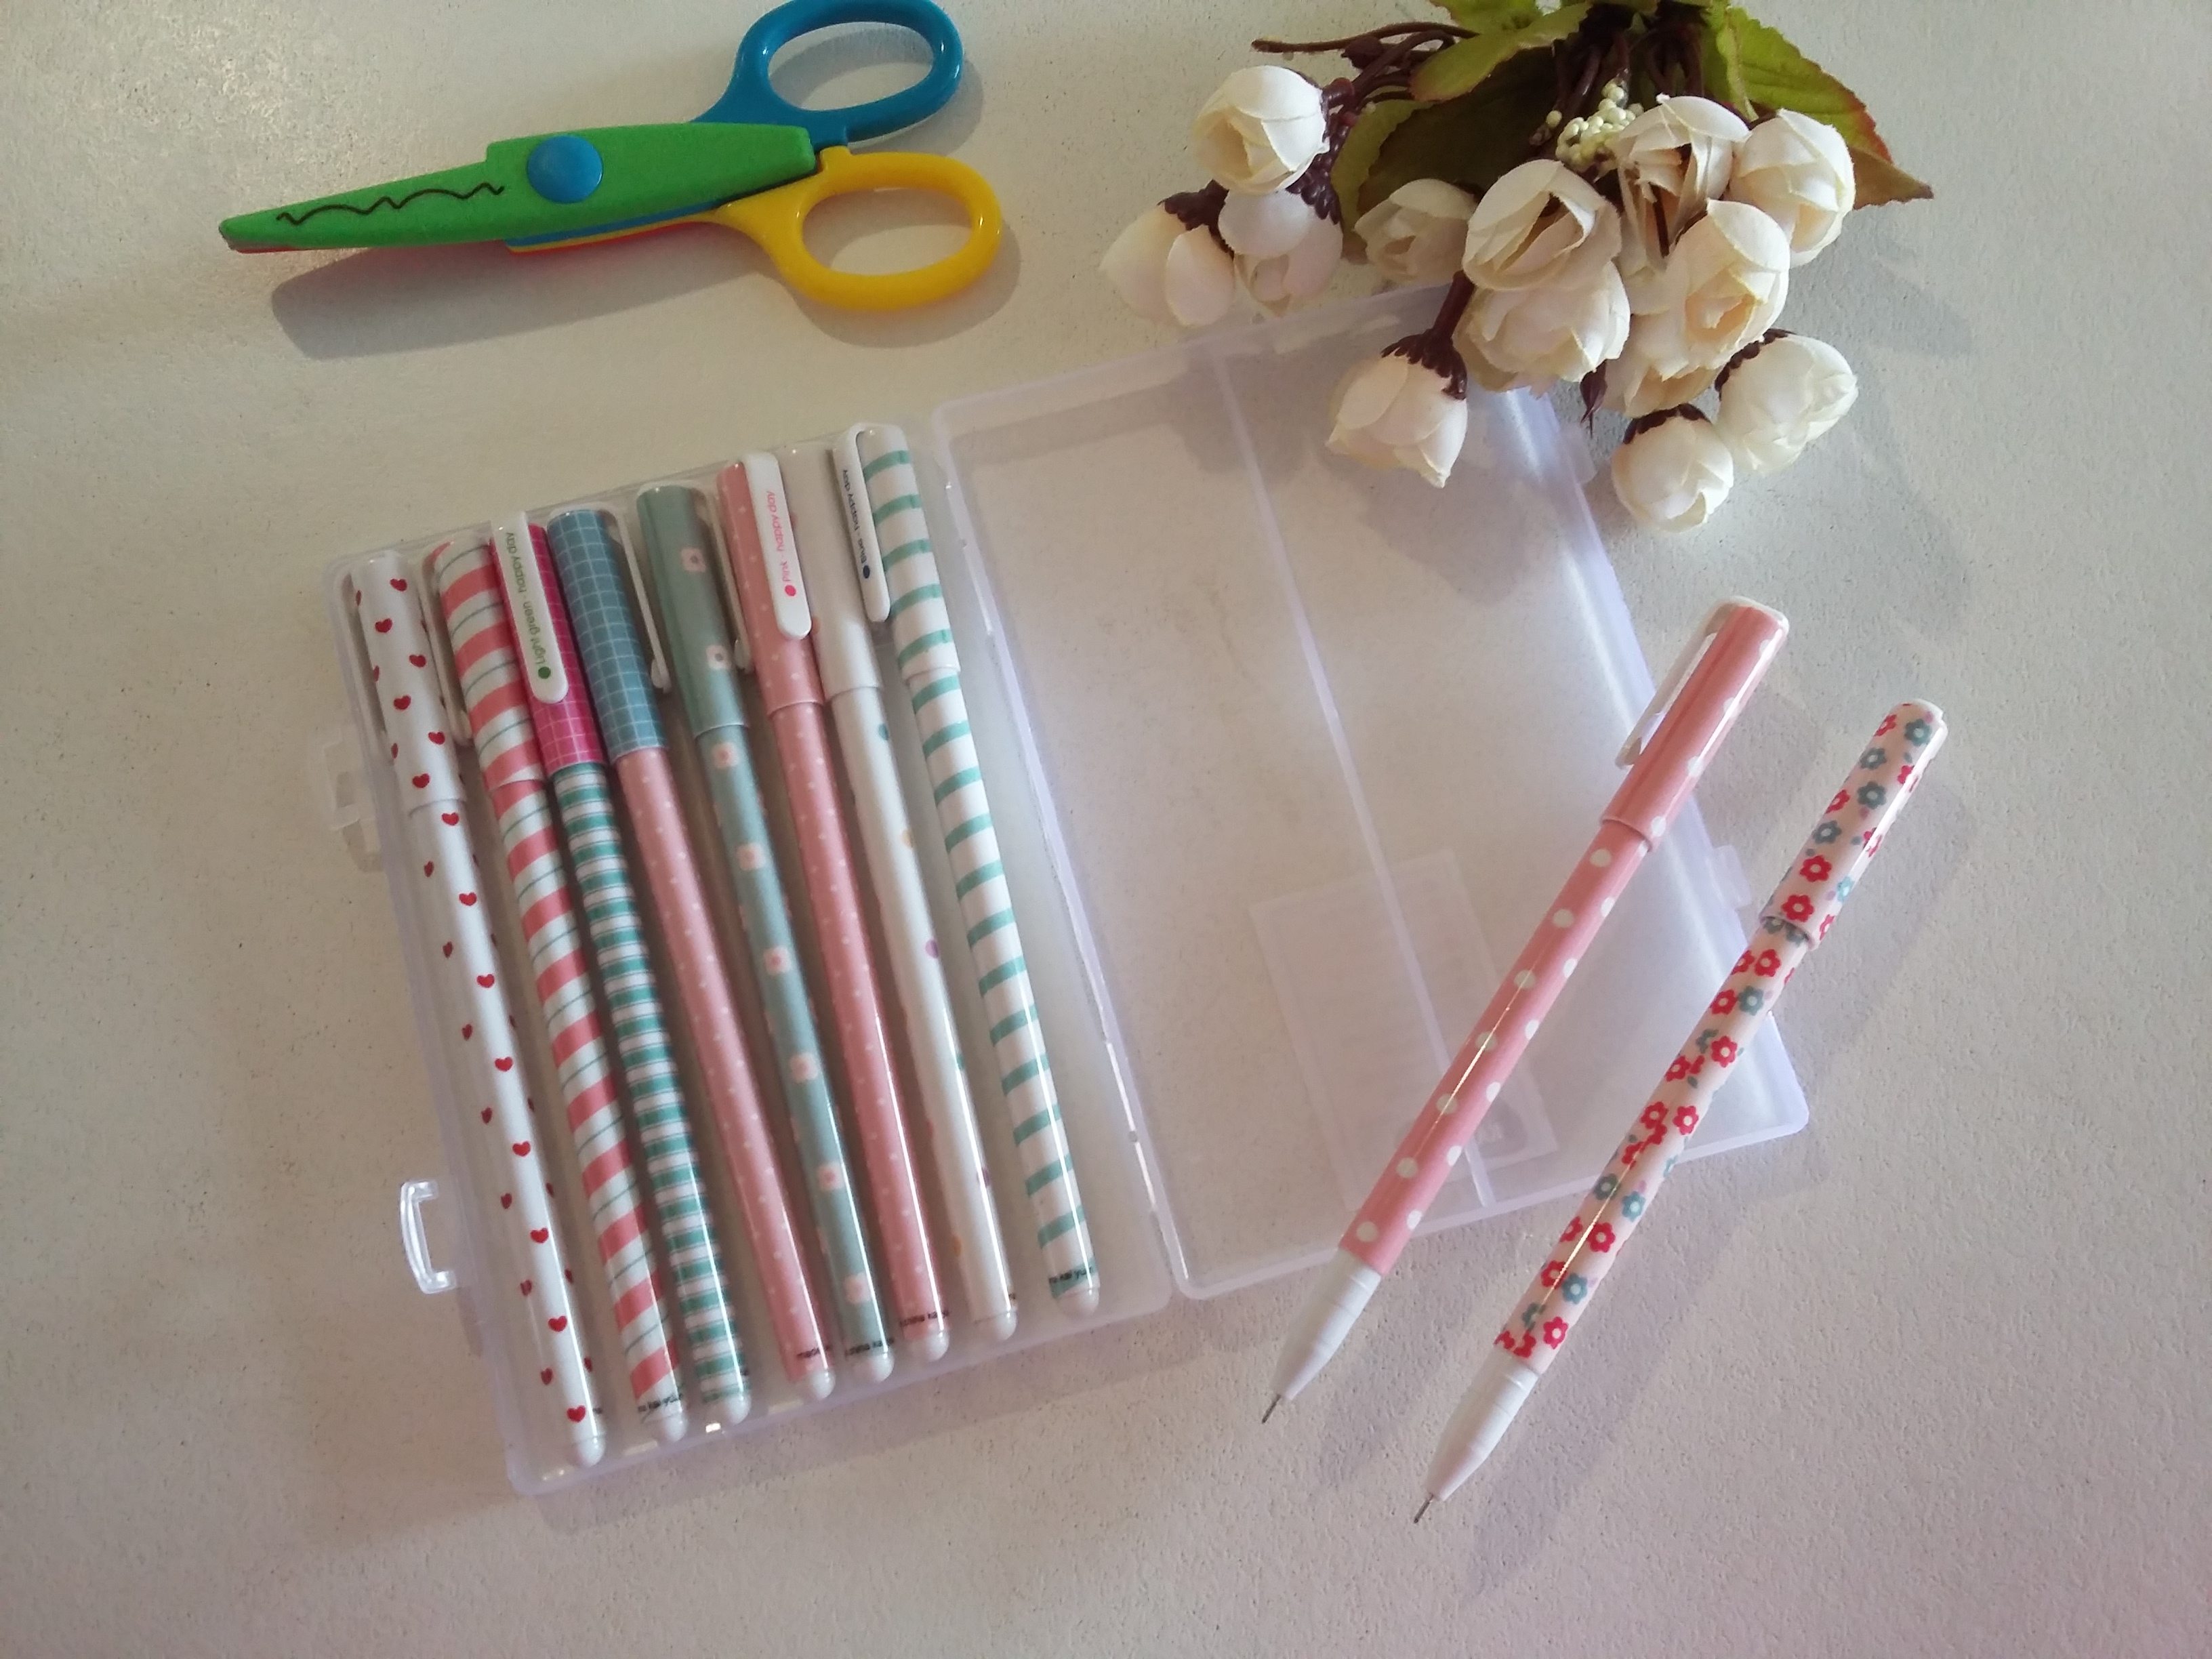
My pens are from a brand called *Mersuii and there are 10 pieces of multi colors gel ink pens. They are great to write with. You can get them here.

pens

So, there you have it today’s #Feb ❤ two for one. Planning and blogging.

Feb hearts post 2

How do you plan your blog posts? Have you tried to be a bit more creative, decorative? Let me know what you think in the comments section below.Do subscribe to my blog if you like what I have to say (it does help me out and thanks if you do). Connect with me on Pinterest / Twitter/ Instagram. Don’t forget to ‘pin’ this post :). Sharing is caring. Check out my previous #Feb ❤ here.

Thanks for reading.

xx


Plan with me: The Polka Dot Spread & Free Printable

I ❤ polka dots and I wanted to make a polka dot spread, so this week’s spread is just that. I got digital paper from aestheticaddiction ( I have a coupon code and a printable to share with you later on),I made a few full boxes on sticker paper, and I also printed a polka dot jpeg which I used as the background for half of my week.

My spread

full spread polka dots pin right

This week’s planning

This week I put all my work schedule on one page and my to dos/ to pay, blog post ideas and other little things on the next page. I also found a few quotes and printed them on sticker paper and added them on my spread.

Stickers used

❤ The rose on the left hand corner, the paint box, the lap top, the piggy bank, the open book and the bath tub are from Michelle and Patch.


❤ The nail polish and the coffee mug are from Planner Chick designs.

❤ The rose on the right hand side (with the stalk) and the cocktail glass are from shop Alissa love.

❤ The tabs and tear drops are from Lilly Top stickers.

❤ The scale is from the Sassy Planner.

❤ The visa card, the lip stick, and the weight is from Lemon Paper co.

Aesthetic addiction polka dot digital paper. I have some coupon codes from her store for you guys.

20DISC – this is good for 20% off a purchase.
50DISC – 50% of any order over $10.00

Paperclips

The pearl paperclip I made by myself.

The glitter flower paperclip I made myself. You can read the DIY post here.

The owl paper clip is from CandLcrafts1

 Get my polka dot printable here:

polka dot paintPolka dot printable with boxes

So, that’s all lovelies. I hope you like my spread ❤ ❤

Do subscribe to my blog if you like what I have to say (it does help me out and thanks if you do). Connect with me on Pinterest / Twitter/ Instagram.Maybe even give my Facebook page some TLC? Don’t forget to ‘pin’ this post 🙂 Remember the comments section is all yours.

Full spread polka dots with right pin


Happy planning xx

Gift ideas for your ‘girlie’ friend (what I got for my birthday)

January the 8th was my birthday, and today I am sharing with you a ‘what I got for my birthday post’ because I like reading them, and you may get inspired and have a gift idea for one of your friends! So, here’s what my friends know I like:

❤ makeup

❤ bags

❤  planner stuff

❤  clothes/ scarves

and ….. that’s what I got. My friends spoiled me loads. So, let’s unwrap, shall we?

PicMonkey Collage

Pressies

One of my friends made me this beautiful scarf. It is a one piece scarf in a nice mustard/gold colour. Isn’t it lovely? A homemade pressie   ❤

scarf.jpg

I love stationery, I like planner stuff, so my sis got me a big box, which I can use to store things, some washi tape, a cute notebook, and of course pens!

box up 2.jpg

My mum and my sis also got me some lipsticks, a blush, some nail polish and an eyeshadow brush. Now, let me just say that I have already used the eyeshadow  brush and I love it (small shading brush: applying and blending powders). It has a very small brush, but that is what I like about it. You see, I don’t see that well and I usually smudge my eye shadow (unintentionally), but this brush allows me to control the eye shadow more! I actually went and got a 2nd one (yup). The lipsticks are called Fancy Freesia (fuchsia) and Rust me (chocolate/red-ish). The blush is called golden peach and it is a gold/pink colour that shimmers just a bit (this is me giving a colour blind friendly round up of the colours).

HM.jpg

I also got a going out bag from the brand Coccinelle. I know, right?

bag.jpg

A nice and warm (fluffy) hoodie from H&M. So nice to wear. I am actually planning on joining the gym (let’s see if that happens).

hoodie.jpg

Victoria’s secret lip products: a lip gloss, lip oil (ummm dunno what that is) and a lip balm.

Victorias.jpg

Lancome Ombre Hypnose (ultra twinkling colour high fidelity) in the colour sorbet rose (golden pink) and Ombre Hypnose Stylo in the colour 05 (grey/very light charcoal).

Lancome.jpg

So, there you have it. Of course life is not about material goods but being happy. I am really grateful for all the lovely gifts I got and I am thankful. I had a lovely birthday party with my friends that night. We laughed, sang, smiled. That, in the end, is what matters. The good times.

Do subscribe to my blog if you liked this post.  Connect with me on Pinterest/ Twitter/ Instagram.Maybe even give my Facebook page some TLC?  Remember the comments section is all yours!

PicMonkey Collage.jpg

Thanks for stopping by.

xox


DIY flower paperclips

Hi lovelies!

I have been making my own paperclips for the past few weeks and will be posting a few DIY posts, but I really got excited about my latest paperclip, so I thought I’d write a post now, and wait later 😀

Pin picture

My creation

This is a pic of my flower paperclips. You can use them in your planners/ binders, books or wherever else you use paperclips.

What do you need?

Plastic flowers with the leaves (preferably white and flowers that you can squash a bit so the flatten out and are not too puffy).

Nail polish with glitter OR glitter and clear nail polish OR glitter spray ( I didn’t have glitter spray which is why I chose nail polish. Also nail polish stains cloth which in this case is good cause it won’t budge).

Glue (ask for glue that sticks metal to cloth).

Washi tape

Scissors

Paperclips

Gloves OR nail polish remover 🙂

Patience 🙂

all together.jpg

❤ Step one

Grab your bouquet and cut your flower off it. There are plastic bits behind your flower. You need to cut them off too! Flatten the flower a bit (gently) so it is not as puffy. Take some nail polish and pour a small bit onto paper (not cloth cause it will get absorbed more quickly). Dab your flower onto the nail polish and let it dry. Depending on how glittery you want your flower to be, you dab more.

TIP 1: I chose red and white flowers.

TIP 2: If you don’t have nail polish with glitter,then use glitter and clear nail polish. I didn’t have glitter either, so I looked round my house and saw this vase full of stuff with glitter. I shaked that a bit and viola… I had glitter!

Wait for flower to dry.

❤ Step 2

Put washi tape on your paperclip so you have a flat surface to glue your flower on.

❤ Step 3

Stick your flower onto the washi. Keep it pressed for a while and then let it dry.

❤ Step 4

Back to your bouquet. Cut off the leaves and after your flower has stuck to your paper clip, stick the leaf on the other side. Press it for a while. By adding the leaf  you cover the washi on both sides.

Let your paper clips dry.

What else can I use?

Well, I got  little stickers that have fake drops (like diamonds) and pink diamond stickers from a crafts supply store . I stuck those onto my flowers to mimic a kind of raindrop effect.

Durability?

Durability depends on how gentle/rough you are with your paperclip. I have not had any problems.

If you don’t have any of these things at home, you can get some from Amazon. I did a little search and found some fairly inexpensive items (these are affiliate links which means I get a small commission from your purchase, but the price for you is the same).

780pcs Bling 6mm Multicolor Sheet Diamond Crystal Rhinestone Gem Self Adhesive Stickers

Get this here. Current price for 780 pieces:$5.99.

diamond stickers

KINGSO 1 Bouquet 21 Heads Small Artificial Peony Ranunculus Flowers Garden Craft Home Wedding Decor

You can get this here. Current price $3.99.

Amazon bouquet.png

Screen shot from Amazon. com

 🙂 Subscribe to my blog if you like what I have to say.  onnect with me on Pinterest/ Twitter/ Instagram.Maybe even give my Facebook page some TLC?  Remember the comments section is all yours.

Pin picture

Happy DIY-ing 😀

Thanks for stopping by


Plan with me:the ‘rich’ spread & Free printable

Hi lovelies!!

Today’s spread is with digital paper from AestheticAddiction and the printable is something I put together myself. Disclaimer: I am colourblind and while I do think this spread looks ‘busy’ , I prefer to label it as ‘rich’. Colours don’t distract me, so I find it pretty.

glowy spread PIN

My spread

In the top boxes I write down my work schedule. In the bottom boxes my To Dos and things that need to be dealt with some time this week. My sidebar has been dedicated to money and kilos! I want to track how much cycling I do and my weight. I think that if I have that in my planner I will feel guilty and end up doing some exercise.

Printing tips: I made this using Word. If you want a post about how I made this, please let me know in the comments below.


Extras

You can download the printable here.

Doc2

Dimensions: width 1.5 inches and height 2.5. I use the Happy planner with the gold heart in the middle (dunno its name :D).

Make sure that when you press print you have chosen the printer option: “actual size” otherwise the boxes shrink. Trial and error folks.

I interview Aestheticaddiction a while back and she gave me two jpegs and coupon codes which are still valid. You can find the coupon codes and the jpegs here (I made new covers for my planner with the jpegs)

Other stuff. The washi tape is from the 1 euro store. The pearl paperclip I made myself. The pens are from local bookstores but Amazon sells similar ones.Rbenxia Gel Ink Roller Ball Pens Plastic Cartoon Pin Type Office Students Pen Pack of 10pcs * You can get them here.


pens

If you are looking to buy an Eric Condren planner, I have a $10 off offer for you guys if you purchase the planner by pressing the words $10 off my ELCP below (this is a referral link).

$10 off my ECLP$10 off my ECLP

*If you want a Happy Planner and are not in the US (that’s what I am using and I love it), you can buy the same one as mine by pressing here.

spread rich


This is the part where I beg for followers 🙂. Subscribe to my blog if you like what I have to say.  Check out this post.about being colour-blind. Connect with me on Pinterest/ Twitter/ Instagram.Maybe even give my Facebook page some TLC?  Remember the comments section is all yours. Check out my planning category on the side bar for more planner-related posts and freebies. If you love stationery and organisation, check out this post.

Thanks for reading! Happy planning everyone 🙂 ❤ ❤


You have two blogs? Tips to make it (kinda) work

I have been an educational blogger since 2013. In September I started a 2nd blog because I cannot keep on bombarding my (edu)readers with girlie/lifestyle posts. That’s how this blog was born. But as 3 months have gone by, I can tell you that it is not as easy as it seems. Today, I am going to share with you some of the things that have worked for me and some that I am still trying to figure out.

Things you need to ask yourself

  • Why am I blogging?

This is probably the most important question. What do you want to achieve through blogging? For me, at the moment, blogging is a source of fun and pleasure. I enjoy it. I like sharing my thoughts, interacting with you guys, and learning (because you do need to do a bit of research for some posts). I also think that blogging is an outlet for my writer/author aspirations. When I was a kid, I wanted to become a writer. I actually wrote little books (yeap).

  • Niche vs. no niche?

Next thing you need to think about is whether your blogs are going to be focused on something or more general blogs. I have one blog that focuses on teaching English as a second language. That’s my niche. I mostly actually write about English for Specific Purposes which is teaching Business and Academic English. So, I have somewhat of a niche within a niche.

Regarding this blog though, I am still trying to find my voice. I do know that a lot of my posts have to do with planning, beauty, being colourblind, and shopping/reviews. I guess this all goes under the lifestyle umbrella (?).

Finding a voice and deciding on what you will be focusing on takes time. You also see what your readers like and if you like the same things, this may help you.

  • Do I have the time?

This goes back to the first bullet point. Why are you blogging and do you have enough time to blog? Intertwined these two folks.

Since one blog is not enough, are there any benefits of having two? Can one help the other?

For me, yes. I have been edublogging, but cause I am a wacky edublogger, I did write various loose-r edu blog posts. Posts about planning, books, being colourblind, even how I spent my summer in the UK. So, I was able to reblog/adapt the posts here.

You can get readers from one blog, read your other blog. I do have lovely teachers who read my edu blog,they pop over here as well, and follow this blog too (thanks dears xxx), but I do not bombard my teacher friends with the blog posts on this blog. “So, what should I do?” you may ask. To share (with your existing readers) or to not share?That’s the question! I guess this is up to you. I do not like being pushy.

How I am going about….’doubleblogging’

Social media: Because I didn’t want to bombard the people who were reading my educational posts with my ‘lifestyle’ ones, I decided to make different social media accounts. So, this blog has its own Twitter/Facebook page/email account. My Instagram is mostly for here and my Pinterest board is for anything.

Making it work: I plan. A lot.  I write down my ideas for both blogs and then try to squeeze in posts. Getting ideas is easy. Finding the time to write is difficult. This is probably the biggest challenge. It is very hard to keep two blogs going because I am a full-time teacher.

Sharing and promoting is also very time-consuming. I do schedule posts and I am using Buffer, but it is still hard to promote what I write. So this is something you need to think about as well (referring you back to bullet point numero uno).

So, that’s all folks. These are my thoughts on having two blogs. A few suggestions on how to make it work. I am still learning though. I will be back with a follow-up post. No worries.

Now, this is the part where I beg for subscribers and followers etc. etc. But anyhow, here goes. Do follow my blog if you want to read more from me. Connect with me on Pinterest/ Twitter/ Instagram.Maybe even give my Facebook page some TLC?  The comments section is all yours. Check out my writing/blogging page for more posts about blogging/writing.

Blog post pin

Thanks for reading.

Joanna

Plan with me: Using inserts in your weekly spread

Hi lovelies,

Today I decided to be a bit more meticulous with my planning and use add ons/ inserts in my weekly planning ‘ritual’. So, I will show you what I used and how I planned.


How I planned

I used my Happy Planner and the Storyteller 2016 : Story Planner System A5 Calendar / Vertical / Inserts I got from The Lilypad.

There are 4 sheets. I used the weekly planner spread to write down what I have to do in the mornings/afternoons/evenings. I wrote my work schedule and general tasks. I used sticker paper for these two sheets.

1sthalf


I also printed on a different coloured sheet  the weekly stories page on which I wrote down my blogging plans for this week. The other sheet had functional boxes that included What I am eating and Pay now/ On time/ Important boxes. I used the what I am eating not to document my eating plan for the week,but to write down what I actually eat because I am starting a diet and I want to document my junk food consumption  :D. The  other boxes were used according to their headings. Pay now for bills. On time for deadlines and important for things I mustn’t forget to do.

coloured paper


What I like about this spread

I have more space to write. I have space to do more detailed planning (my blog posts) and it looks nice with the different coloured sheets.

Stickers I  used

Washi tape and love hearts from the one euro store (here in Greece).

Pinterest pic.jpg


If you want to check out The Lilypad, press this link. She has lots of planner inserts and other planner/scrapbooking -related products.

This is the part where I beg for followers 🙂. Subscribe to my blog if you like what I have to say.Check out my latest post on how to store your pens/pencis using mugs and jewelery boxes.

Connect with me on Pinterest/ Twitter/ Instagram.Maybe even give my Facebook page some TLC?  Remember the comments section is all yours. Check out the planning category (side bar)for more planner-related posts.

Thanks for reading!


How to use mugs and jewelry boxes to get your stationery organised

Hi!!

Today I am going to show you a happy place on my desk and give you ideas on how to store your pens and all your stationery. I will also show you a few things on my amazon wish list and maybe inspire you (please keep in mind that I use amazon affiliate links, so if you choose to buy something, I will get a small commission. You do not pay extra though). So, without further ado, here is how I keep my desk… a bit organised.

=storage.jpg


Mugs to keep your pens and pencils

I think mugs are so pretty and I have two in which I put pens and pencils. I am going through a stationery addiction at the moment and buying all these pretty little pens. I am trying to have more white and soft colours instead of black. I have a transparent glass mug with flowers and a white mug with zigzags. As I wanted it to be a bit more pretty I put some small flowers bouquets in the mugs.


Jewelry box

You know that nowadays you can find loads of jewelry boxes with draws. I got one with roses and polka dots. In the drawers I store little bits and bobs I need.

jewelry box


One drawer erasers, liquid paper, paper clips etc. I have another draw for chewies, pills I need to take everyday and a lighter. I have a drawer with hair ties, elastic bands etc, and my final drawer has all my usb sticks (FYI: I am an online teacher and well, a face to face teacher , so I need all this stuff lying around on my desk. I also have a few small notebooks next to the jewelery box/stationery organiser and of course my lovely Kawai erasers.

My wish list

Pretty mugs

Royal Albert China New Country Roses Cheeky Modern Mug, White/Pink . You can find it here.

Roayl albert mug.png

Paperproducts Design Gold Rose 11-Ounce Porcelain Mug, Set of 2 . You can get this here. I like how this has 2 mugs and it comes with a case which you can use to store envelopes, bills, notebooks etc.Mug set.png

Jewelry box

Jewelry Accessories Box – Colorful Flowers With Drawers. You can get it here.

jewelry box.png

Cute pens

Rbenxia Gel Ink Roller Ball Pens Plastic Cartoon Pin Type Office Students Pen Pack of 10pcs  You can get them here.

pens.png

Amazon screenshot


Cute erasers

Sweet Treat Erasers Bakery 4 Pack . You can get them here.

erasers.png

Amazon screenshot


These are some of the things I like. You can go and check out similar things on Amazon or Etsy stores or your local stores.

stationery pin.jpg

Don’t forget to ‘pin’ this 😀


This is the part where I beg for followers 🙂. Subscribe to my blog if you like what I have to say. If you don’t, gimme another chance. Check out this post.Connect with me on Pinterest/ Twitter/ Instagram.Maybe even give my Facebook page some TLC?  Remember the comments section is all yours.

Thanks for reading!

Birthday Stationery and Planner Goodies Winners

Congratulations

PicMonkey Collage

The winners are:

Lizzy Cooper (UK): Stationery

Jules Elley (UK): Planner goodies

I will be contacting these ladies via mail, so please check your email ladies. For the rest of you who left a comment and followed my blog in various way, I have more giveaways planned next month so stay tuned.

Happy Sunday everyone!!! 🙂


Birthday plan with me & HUGE giveaway

Giveaway Closed. Winner to be announced.

Hi lovelies!

On Friday it’s my birthday so I though I’d share with you my birthday spread and do a stationery giveaway. I will be giving away an extra set of the Birthday kit, some extra planner stickers and lots of stationery cause we ❤ our stationery (for details on how to take part, please read till the end).

Turning 40-my spread

My birthday spread

So, Birthday plan with me. It’s my big 40 people!!

How did I plan? What did I use?

I wrote down all my weekly chores on the top boxes in the 1st 3 columns and I also included my work schedule whenever I had work. The side bar and some of “Monday column” were dedicated to my Birthday.The sidebar is for who is invited and RSVPed and ‘Monday’ is my To Dos.

The kit which I used and will be giving away (a new one of course) is from Lilly Top stickers (Etsy store link can be found here). It’s bright, very colourful. Just right for a birthday.

The giveaway

There are 2 prizes so there will be two winners. One is stationery, the other is more planner-related. If you take part in the giveaway, you will be included in both draws (keep reading for details.

What’s included?

Prize 1

Birthday spread full

Prize 1

Planner-related

You will get the Birthday kit (2 sheets) which I purchased from Lilly Top and the two extras (nail polish/cleaning icons) which she kindly added to this giveaway (thanks Jules). 2 birthday bookmarks and a bigger bday card, some sticky notes, a paperclip, a little paper-cutter (cuts cupid shapes) and the an eraser that is useless but looks like a present (so cute!). The kit is for the ECLP, but I used washi and it was fine!! No planner included just planner kits.

Prize 2

stationery

Prize 2

Stationery

So you get 4 pens that smell like fruit, 3 mini notepads, 3 paperclips, butterfly stickers, a paper-cutter (flower shapes) and again a useless but really cute eraser that looks like… flip-flops!!!

How to enter the giveaway

You must do 2 things:

  • Follow this blog via email subscription (first option on the sidebar)
  • Leave a comment below saying whatever you want, but mentioning your preference. Say for example you prefer the planner stuff first, then the stationery or vice versa.

In order to take part you must do both!If you are already following my blog via email, please mention it in your comment!Don’t worry if your comment does not show up straight away. Some require moderation and I will approve them the moment I see them!!

Extra info regarding the giveaway

It starts today 4th of January and will end on the 10th at 12 o’clock CET (central european). The first person drawn will get the prizes based on his/her preference. The second person will get the remaining prize. Winners will be chosen via rafflecopter. This giveaway is open internationally (yeap, yeap) and I will be sending the goodies via registered mail. The winner will be contacted via email and in a blog post.Only the items included in pictures with the caption prize 1/prize 2 are in the giveaway.

Don’t forget to subscribe to my blog and comment if you want to enter the giveaway! ❤  ❤

I am also doing a skin care giveaway which you may want to check out here (different requirements).

PicMonkey Collage

If you are looking to buy an Eric Condren planner, I have a $10 off offer for you guys if you purchase the planner by pressing the words $10 off my ELCP below (this is a referral link).

$10 off my ECLP

*If you want a Happy Planner and are not in the US (that’s what I am using and I love it), you can buy the same one as mine by pressing here.

Check out my planner category for loads of planner-related topics, coupon codes and printables. Connect with me on Pinterest/ Twitter/ Instagram.Maybe even give my Facebook page some TLC?  Comments section is all yours. Thanks for reading. Good luck everyone!!! And of couse… happy planning!!!!!!! Remember for the giveaway you must also subscribe via mail to my blog 🙂

Talk soon

xx
a Rafflecopter giveaway
https://widget-prime.rafflecopter.com/launch.js

GIVEAWAY CLOSED